
.png)
Pikachu Lunchbox (Jumukbap) + Poké Ball Rice Balls
- MyFreshDash

- Aug 15, 2025
- 3 min read
Updated: Nov 29, 2025

Cute Korean Bento Idea Kids Love
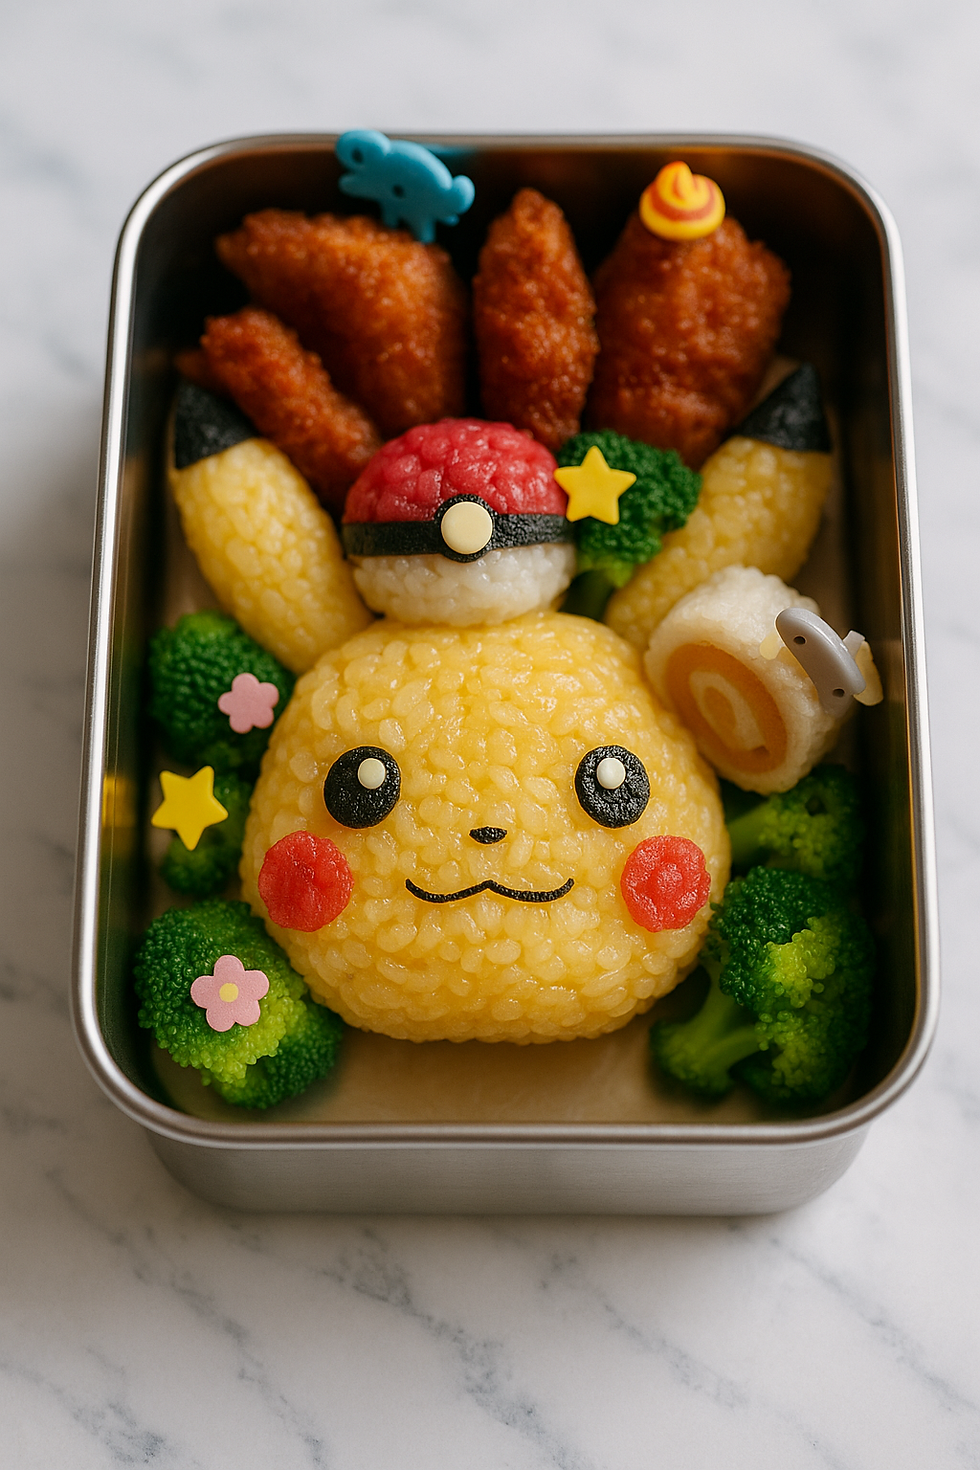
A bright, bite-size lunch that makes kids grin before the lid even opens. We turn warm short-grain rice into a Pikachu face (stuffed with creamy tuna-mayo) and two Poké Ball rice balls colored naturally with pumpkin and beet powders. It’s picnic-perfect, lunchbox-friendly, and way easier than it looks.
If lunch could wink, this one would. We turn warm short-grain rice into a smiling Pikachu stuffed with creamy tuna-mayo, then add two Poké Ball rice balls colored naturally with pumpkin and beet. It packs tight, travels well, and makes even picky eaters curious enough to take the first bite.
TL;DR:
Make Pikachu lunchbox jumukbap and Poké Ball rice balls for a cute, kid friendly Korean bento style meal at home

At a Glance
Serves: 1–2 lunchboxes (1 Pikachu + 2 Poké Balls, plus sides)
Prep: 20 min
Cook: 5 min
Total: ~25 min
Skill: Easy
Heat: None (kid-friendly)
Ingredients

Rice & Filling
Cooked short-grain rice 2 cups (400 g), warm
Pumpkin powder 1–2 tsp (for yellow rice; sub: ¼ tsp turmeric)
Beet powder 1–2 tsp (for red rice; sub: 1 tsp tomato paste mixed with water)
Canned tuna 5 oz (140 g), drained (rinse briefly with hot water if oily)
Mayonnaise 2 Tbsp (30 g)
Salt & black pepper, to taste
Decoration
Roasted seaweed (nori) sheets
White sliced cheese (for eye whites and Poké Ball center)
Imitation crab sticks (for Pikachu cheeks)
Optional sides
Bite-size fried chicken, broccoli florets, fruit, etc.
Equipment
Plastic wrap, small cutters or a straw (for circles), scissors, tweezers, small bowls, Pikachu mold (optional).
Step-by-Step
1) Color the rice
Split rice: ~1 cup for yellow, ~1 cup split for red/white.
Yellow: Dissolve pumpkin powder in 1 tsp water; fold into rice until evenly golden.
Red: Dissolve beet powder in 1 tsp water; fold into half of the remaining rice. Leave the rest plain white.


2) Tuna-mayo filling
Mix tuna with mayo, a pinch of pepper, and salt to taste. Set aside.

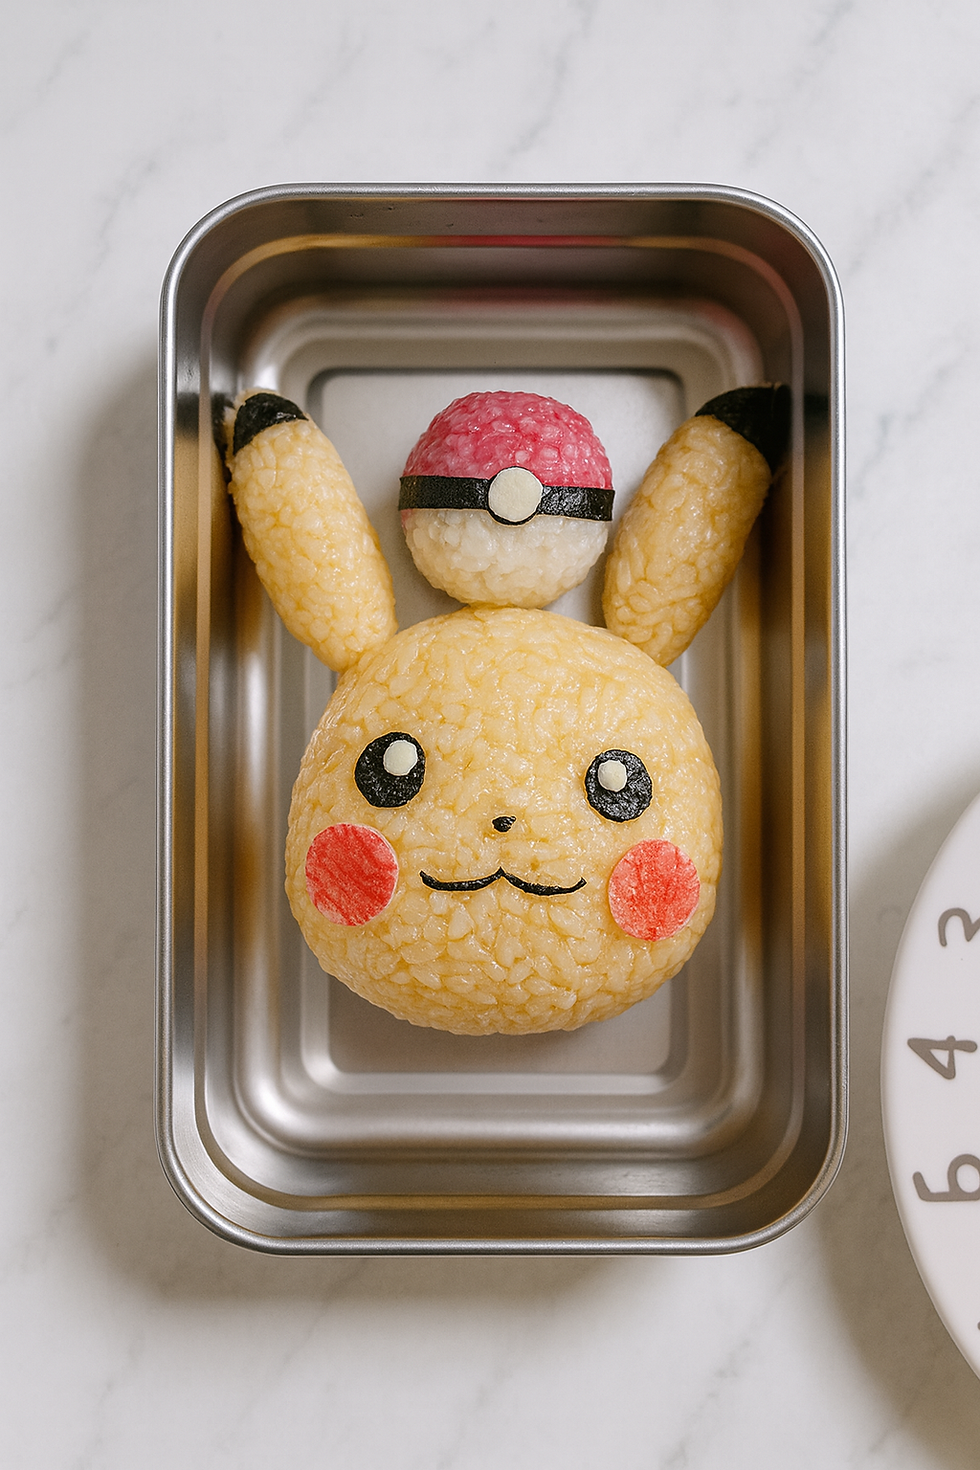
3) Shape the Pikachu (stuffed)
Place yellow rice on plastic wrap, make a shallow well, add tuna-mayo, cover with rice.
Compress into an oval face; shape two pointed ear pieces and attach at the top (use a grain of rice as “glue”).

4) Add Pikachu’s face
Eyes: Two nori circles + tiny white-cheese dots.
Nose & mouth: Micro nori pieces; place with tweezers.
Cheeks: Peel red layer from crab stick; punch/cut two small circles and place on the face.

5) Make two Poké Ball rice balls
Roll one red and one white ball (golf-ball size).
Cut each ball in half; press one red half to one white half to form a sphere. Compress in plastic wrap so the seam seals.
Wrap a thin nori band around the seam; add a white-cheese circle in the center and a tiny nori dot on top.

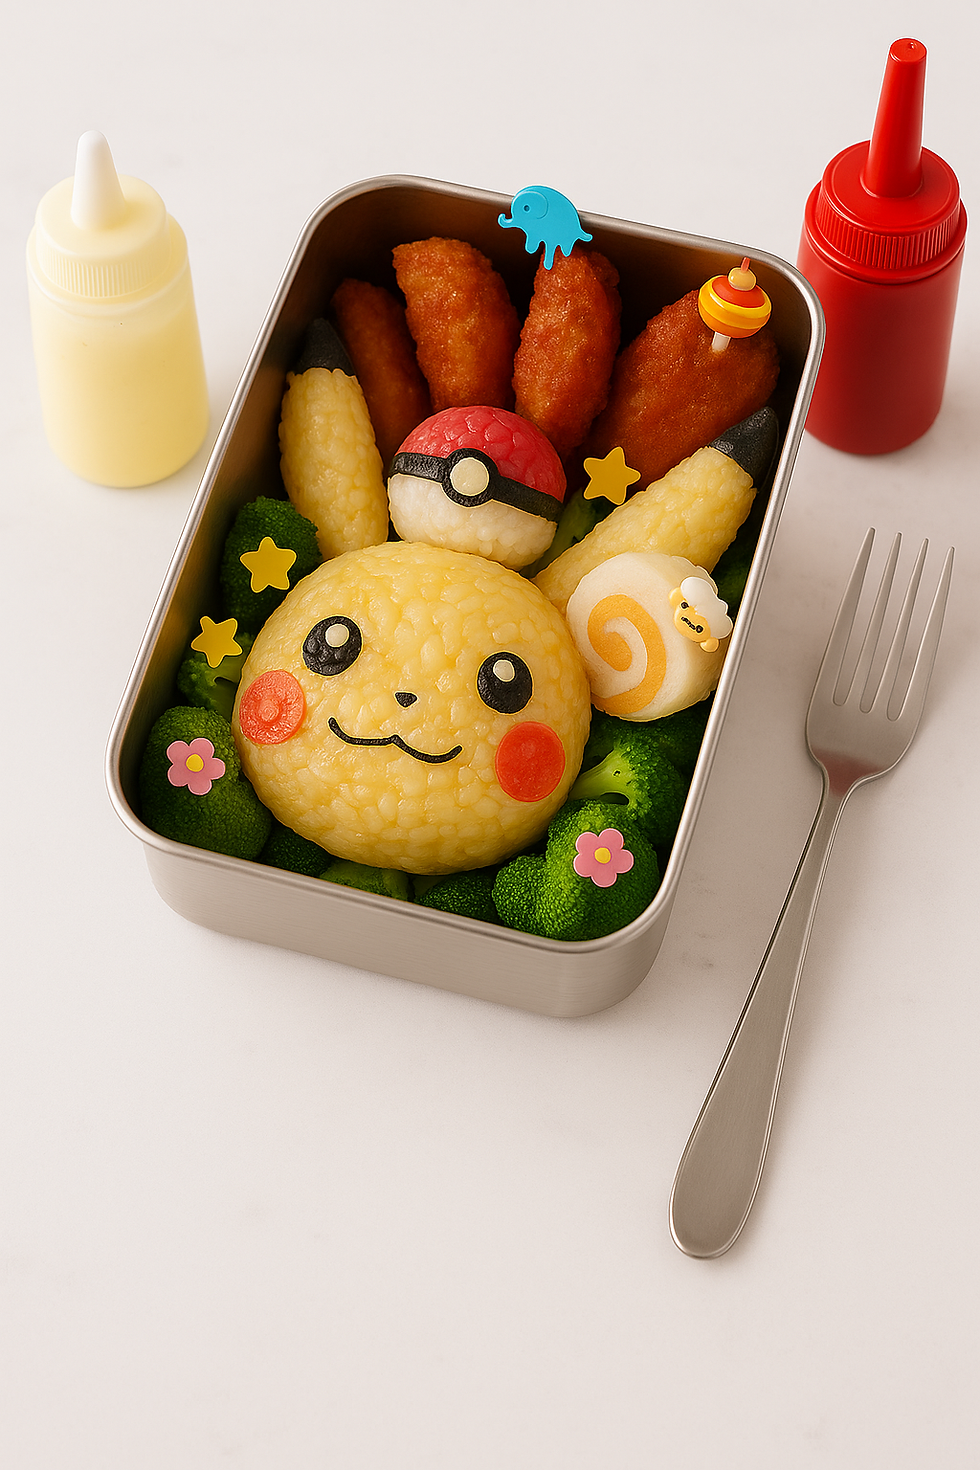
6) Pack the lunchbox
Nestle Pikachu and the Poké Balls snugly so they can’t slide. Fill gaps with chicken, broccoli, and fruit. Close, chill briefly, and you’re ready to roll.


Tips & Substitutions
No mold? Shape by hand—oval face + two ear triangles.
Non-artificial color: Pumpkin/turmeric for yellow; beet/tomato for red.
Stick-proof hands: Lightly wet or oil your gloves.
Adhesive: Use a grain of sticky rice or a pinpoint of mayo for tiny details.
Food safety: Let rice cool to warm before adding mayo; pack and refrigerate within 2 hours.

Storage
Best same day. Refrigerate up to 24 hours; bring to room temp before eating. Not ideal for freezing.
Approx. Nutrition (per lunchbox; rough)
520–680 kcal depending on sides; carbs 75–95 g • protein 20–28 g • fat 14–24 g.
FAQs
1) What is jumukbap?
Korean hand-shaped rice balls—similar to onigiri’s cousin—made with sticky short-grain rice that’s mixed or stuffed, perfect for lunchboxes and picnics.
2) How do I keep the rice balls from falling apart?
Use warm short-grain rice, keep fillings light (about 4 parts rice : 1 part filling), compress firmly in plastic wrap, then chill 10 minutes before packing.
3) How do I color the rice without artificial dye?
Yellow: pumpkin powder or a pinch of turmeric. Red: beet powder or a little tomato paste diluted with water. Dissolve first, then fold into warm rice for even color.
Recommended from MyFreshDash
• Spam Mayo Cheese Flower Rice Balls — cute, savory jumukbap made for bentos.
• Mayak Eggs (Soy Sauce Eggs) — jammy, no-simmer protein that packs perfectly.
• Egg Bomb Omelette with Katsu Sauce — fluffy café-style omelette that kids love.


Na rodinné sešlosti mi bratranec vyprávěl, jak kdysi vyhrál v kasinu dost peněz na auto. Zeptal jsem se ho, kde to bylo a on mi říkal nějaký divný název. Doma jsem si to hledal a našel jsem https://spinariumcz.com/. Řekl jsem si, že to zkusím s malým rozpočtem. Hrál jsem opatrně a zpočátku to vypadalo na ztrátu. Měl jsem už jít spát, když najednou padla obrovská výhra na jedné jednoduché hře. Vyhrál jsem zpět všechno a k tomu obrovský bonus. V tuzemských podmínkách je tohle určitě nadprůměrný zážitek. Fakt jsem nečekal, že to bude tak dobré. Je super, když rodina doporučí něco, co opravdu funguje a není to jen planý talk.